Buying new window treatments is an exciting way to upgrade your home, but the process can quickly become stressful if you get the sizes wrong. A fraction of an inch can be the difference between a seamless, professional look and a frustrating, poorly fitting fixture that lets light leak in. If you want to learn how to measure windows for blinds correctly, you are in the right place.
Getting precise measurements is essential because incorrect sizing wastes your hard-earned money and delays your project. From professional installers’ experience, we know that success comes down to choosing between an inside mount or an outside mount, and using the right tools for the job. Read on to master the exact industry-standard methods you need for a flawless installation.
Why Accurate Window Measurement Matters
You might wonder if you can just estimate the size of your window. The short answer is no. Taking the time to measure precisely offers several crucial benefits:
- Perfect Fit: A snug fit provides better light control and ensures maximum privacy for your family.
- Improves Aesthetics: Correctly sized blinds look custom-made, elevating the overall design of your room.
- Avoids Gaps or Overlapping: Too small, and you get annoying light gaps. Too large, and the blinds will scrape against the frame or look bulky.
- Saves Money and Time: Custom window treatments are often non-refundable. Measuring correctly the first time prevents costly reorders and frustrating delays.
Tools You Need to Measure Windows for Blinds
Before you start writing down numbers, gather the right equipment. Using the wrong tools is a common trap that leads to faulty data.
- Steel measuring tape: Never use a cloth tape measure. Cloth stretches over time and bends, leading to inaccurate readings.
- Pencil and notebook: Write down every measurement immediately to avoid memory errors.
- Step ladder: Use a stable ladder if you need to reach high windows securely.
- Metal ruler (optional): This helps measure exact depth requirements for brackets.
Understand Mount Types Before Measuring
You must decide how you want to mount your window coverings before you take a single measurement. Your choice determines exactly where and how you measure.
Inside Mount Blinds
Inside mount blinds are installed entirely inside the window frame. This creates a clean, modern look that highlights your window molding. Because the fixture sits flush within the frame, inside mounts require incredibly precise measurements. You must also ensure your window frame has enough depth to hold the mounting brackets.
Outside Mount Blinds
Outside mount blinds attach above the window opening, either on the window trim or directly onto the wall. This style is ideal for small, shallow, or uneven windows. It also offers superior light blocking because the material overlaps the window opening, eliminating side gaps.
| Feature | Inside Mount | Outside Mount |
| Look | Clean, minimalist, shows off trim | Bold, makes windows look larger |
| Light Control | Small side gaps may let light in | Excellent light blockage |
| Precision Needed | Extremely high | Moderate (allows for overlap) |
| Window Depth | Requires minimum depth | No depth requirement |
How to Measure Windows for Inside Mount Blinds (Step-by-Step)
If you chose an inside mount, follow this exact process to ensure a snug fit.
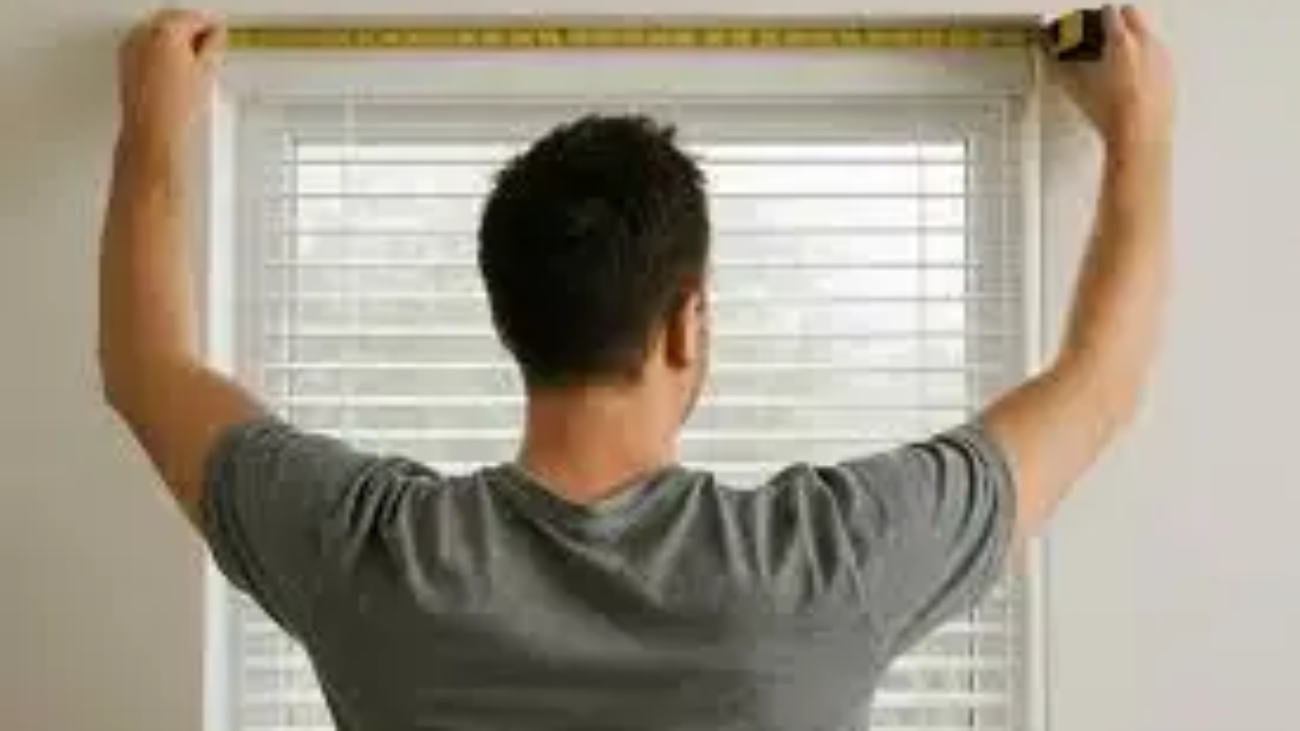
Step 1: Measure Width
Place your steel measuring tape inside the window frame. Measure the width in three places: the top, the middle, and the bottom. Write down all three numbers. Circle the smallest measurement. The factory will use this smallest width to ensure the hardware clears the frame without scraping the sides.
Step 2: Measure Height
Next, measure the height from the top inside edge of the window frame down to the windowsill. Do this on the far left, the center, and the far right. Write down all three numbers. This time, circle the longest measurement. Using the longest height ensures your blinds will reach all the way to the bottom and provide full coverage.
Step 3: Measure Depth
Measure the depth of your window frame from the glass to the outer edge of the casing. Check the manufacturer’s product guide to see the “minimum depth requirement.” If your window is too shallow, the headrail will stick out, or you may not be able to install an inside mount at all.
Pro Tip: Always measure in exact inches down to the nearest 1/8th of an inch. Do not round your numbers up or down. Precision is the key to a professional fit.
How to Measure Windows for Outside Mount Blinds
Outside mounts are slightly more forgiving, but you still need a methodical approach to guarantee good coverage.
Step 1: Measure Width
Measure the width of the window opening. To ensure the blinds block light effectively and cover the frame entirely, add extra inches to this measurement. Industry best practices recommend adding 2 to 4 inches to each side (4 to 8 inches total).
Step 2: Measure Height
Decide exactly where you want to place the headrail. Usually, installers place the top mounting point 2 to 3 inches above the window frame to prevent light from leaking over the top. Measure from this top mark down to your desired length. If you have a protruding sill, measure down to the sill. If the sill does not stick out, you can measure past it for maximum coverage.
Step 3: Consider Overlap
Review your final numbers to ensure adequate overlap on all four sides. Proper overlap is the secret to getting a room truly dark and maintaining total privacy.
Standard Window Sizes vs Custom Measurements
You might think you can just buy standard sizes at the hardware store. However, not all windows are standard. As houses settle over time, window frames shift, meaning a window that looks perfectly square rarely is.
If your measurements match off-the-shelf dimensions exactly, standard blinds can save you money. However, if your measurements are off by even a quarter of an inch, you should choose custom blinds. Custom options give you total control over the exact fit, style, and functionality.
Common Mistakes to Avoid When Measuring Windows for Blinds
Even DIY veterans make mistakes. Keep your project on track by avoiding these common errors:
- Using fabric tape instead of steel: Cloth bends and stretches, ruining your accuracy.
- Rounding measurements: Rounding to the nearest half-inch will result in fixtures that are too tight or too loose.
- Measuring only once: Measure twice to verify your numbers before placing an order.
- Ignoring depth: Failing to check depth means your inside mount brackets might not fit.
- Confusing width and height: Always format your numbers as Width x Height. Mixing these up is the number one reason for returns.
Expert Tips for Perfect Blind Fit
Drawing from years of professional installation experience, here are a few advanced tips to ensure success:
- Measure twice, order once: Double-check every single number. It takes two minutes but saves weeks of hassle.
- Check manufacturer guidelines: Every brand has slightly different factory deduction rules. Read the blinds size guide provided by the specific company you buy from.
- Consider window obstructions: Look out for crank handles, alarm sensors, or window locks. These stick out and can block your new window treatments from lowering properly.
- Account for brackets and hardware: Remember that the headrail houses the mechanical parts. Ensure you have flat space to drill the screws in securely.
- Consult professionals if unsure: If you have angled windows, bay windows, or French doors, reach out to customer support. It is better to ask for technical guidance than to guess.
Measuring for Different Types of Blinds
The general rules apply to most styles, but keep these specifics in mind depending on what you buy:
- Roller blinds: The fabric on a roller shade is always slightly narrower than the top mechanism. Be prepared for a small light gap on the sides of inside mounts.
- Vertical blinds: If installing over a sliding glass door, ensure you measure high enough above the door frame so the hardware does not obstruct the door’s movement.
- Venetian blinds: Because these stack up thickly when raised, consider an outside mount if you want to keep your entire window glass visible when the fixture is pulled up.
- Roman blinds: These feature thick fabric folds. Make sure your window frame has enough depth to accommodate the bulky fabric when fully raised.
Quick Measurement Checklist
Keep this checklist handy when you are ready to tackle the job:
- Steel measuring tape secured
- Mount type selected (Inside vs. Outside)
- Width measured (Top, middle, bottom)
- Height measured (Left, center, right)
- Depth checked against product requirements
- Measurements written clearly (Width x Height)
- Double-checked all numbers for accuracy
FAQs
What is the correct way to measure windows for blinds?
Use a steel measuring tape. For inside mounts, measure the width at the top, middle, and bottom, using the narrowest width. Measure the height at the left, center, and right, using the tallest height. Record measurements to the nearest 1/8th inch.
Should blinds be wider than the window?
For an inside mount, they should be slightly narrower than the window frame so they fit inside without rubbing. For an outside mount, they must be wider than the window opening (usually 4 to 8 inches extra total) to block light and ensure privacy.
How much depth is needed for inside mount blinds?
Depth requirements vary by product style. Generally, you need at least 3/4 inch to 1 inch of flat space for a minimum flush mount, and up to 3 inches for a fully flush mount where the headrail does not stick out at all.
Can I install blinds without professional help?
Yes. If you follow a reliable window measurement guide and take accurate numbers, installing them yourself is a straightforward DIY project that usually requires only a drill, a screwdriver, and a few basic tools.
Conclusion
Learning how to measure windows for blinds correctly is the most critical step in upgrading your home’s interior. Precise measurements guarantee a clean, professional finish, enhance your room’s light control, and protect your budget from costly ordering errors.
Take your time, use a steel measuring tape, and follow the exact steps outlined above. Always review the specific product guides and manufacturer recommendations before making your final purchase. By combining these expert techniques with careful attention to detail, you will achieve perfectly fitted window treatments that look stunning for years to come.